Warung Online

Selasa, 03 Desember 2013

Remove Alarm Clock Clutter on the iPhone with Siri osxdailynews.blogspot.com

Written By Unknown; About: Remove Alarm Clock Clutter on the iPhone with Siri osxdailynews.blogspot.com on Selasa, 03 Desember 2013

osxdailynews.blogspot.com ® Remove Alarm Clock Clutter on the iPhone with Siri

Many alarm clocks on the iPhone 
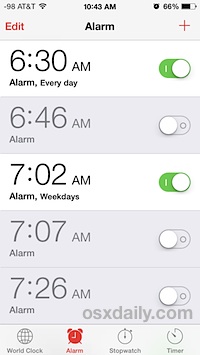
Many of us have an iPhone sit on our nightstand to use as a primary alarm clock. But over time, with schedule changes, early flights to catch, sound changes or new music selections, sleeping in on some days, waking up early on others, the iPhone alarm clock can get extremely cluttered with way too many alarms for just about every conceivable time. Furthermore, as you migrate from old iPhone to new iPhone, these alarms will transfer with, which means you may be retaining an ancient alarm time that was set sometime in a prior presidential administration for a long forgotten reason. If your Clock apps alarm section is cluttered up like this, you’re certainly not alone, but fortunately there’s a very simple way to remove every single alarm and start from scratch; just ask Siri.


Clear out and remove every alarm time on the iPhone:


  • Summon Siri and say “Delete all my alarms”


Siri will ask to confirm that you want to remove them all, so either say “Yes” or tap on the “Yes” option as it appears on screen.


Delete all alarms on the iPhone with Siri


Just don’t do this early in the morning when you’re barely awake or you may oversleep… of course you can always use Siri again to set a new alarm by saying something like “wake me up every week day at 6:45 am”. Or, you can go with a less drastic option and just turn off every alarm rather than remove them…


Turn off every alarm clock instead:


  • Summon Siri and say “Turn off all my alarms”


Turn off all alarms on the iPhone


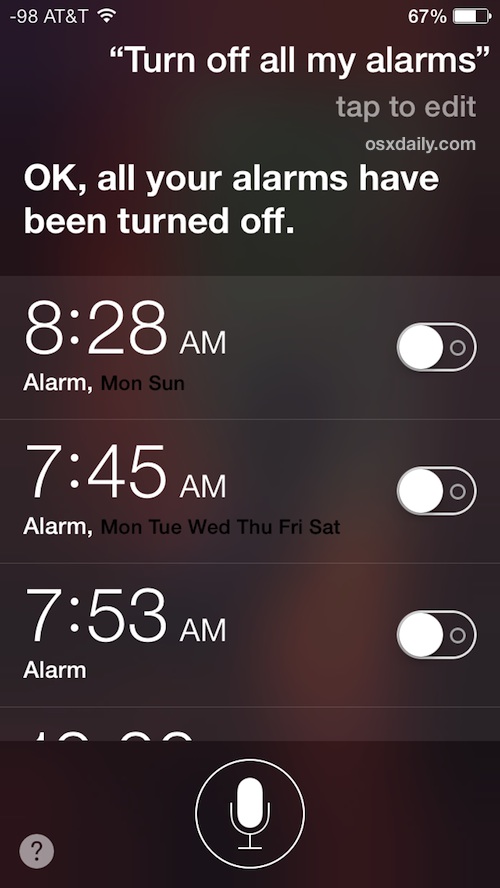
This silences all the alarms which is great if you’re trying to sleep in on a weekend, but don’t forget to turn the important ones back on again.


Heads up to @blam on Twitter for the great ‘delete all’ trick!


Email this Remove Alarm Clock Clutter on the iPhone with Siri to a Friend! Receive Articles like this one direct to your email box! Subscribe for free today!

How to Merge Contacts on the iPhone from iOS osxdailynews.blogspot.com

osxdailynews.blogspot.com ® How to Merge Contacts on the iPhone from iOS

It’s practically inevitable for duplicate contact information to appear on an iPhone or iPad over the course of using an iOS device, whether by accident, typos, through sharing vcard information with others, or from something as basic as contacts changing their names and addresses, for which another entry may be added. For quite some time, there was no simple way of handling these duplicate (or triplicate) contact entries directly on the device, but that has finally changed with iOS 7, and now there is an easy way to merge those contacts directly on the iPhone.


How to Merge Contacts in iOS


Because this is done entirely on the iOS device, there is no longer any need to have to sync back to iCloud, iTunes, or a computer for the change to take effect, instead you make the change once directly on the iPhone, and thanks to iCloud, it will propagate automatically to other iOS and OS X devices that use the same Apple ID.


Merging Duplicate Contacts in iOS


The feature is actually called “Link Contacts”, which is perhaps why it’s not widely used and often overlooked, here is how to use it:


  1. From the Phone app or the Contacts app, open the contact you wish to merge other duplicate contacts with

  2. Tap on the “Edit” button

  3. Scroll down to find “Linked Contacts”, then tap on the green plus icon “(+) link contacts…” to link/merge the contact with another

  4. Locate the contact to merge (either a duplicate or a changed addressee) and tap on the name, then tap on “Link” in the corner

  5. Repeat for more than one duplicate, otherwise tap on “Done” to finish the merging


This instantly merges all contact details from the two (or more) contact cards into a single contact entry – it does not overwrite phone number, address, or email information, it simply merges all details into a single card.


In the example screenshots, the address information for multiple “Santa” and “Santa Claus” has been merged into a single card. The first contact edited will be the one that accepts the merged details:


Merge contacts on the iPhone with Link Contacts feature in iOS


Next, simply find and “Link” the additional contact cards, whether they are duplicates, triplicates, alternate address information, or whatever else:


Merging contacts on the iPhone using the iOS Link Contacts feature


Once you choose “Done”, there will only be a single contact for the details you merged (linked), in this example it’s “Santa Claus”.


The unique thing about the “Link Contacts” method is that although it merges the contacts from the user perspective, it can be easily be undone if you decide to unmerge/unlink the contact details. To do that, just go back to the contact in question, tap on “Edit” and then tap on the red (-) icon along the linked contacts details.


There are other ways to do this which may prove easier for some iPhone users, like those who have their device synced to a Mac and would prefer to manage the details from a computer, or for users who aren’t running the newest versions of iOS and thus don’t have the Link/Merge option at all. Two such alternate methods that can work in these circumstances are merging addresses from OS X and then syncing the address book back to the iPhone, or merging & removing duplicates with the Contacts app from Mac OS X and relying on the iCloud sync feature to carry the changed address information over to the iPhone.


Email this How to Merge Contacts on the iPhone from iOS to a Friend! Receive Articles like this one direct to your email box! Subscribe for free today!

Change the Number of Files Shown in “Open Recent” Menu Items of OS X osxdailynews.blogspot.com

osxdailynews.blogspot.com ® Change the Number of Files Shown in “Open Recent” Menu Items of OS X

Adjusting the number of files in the Recent list


The File menu in just about every file-centric application throughout OS X has an “Open Recent” option, which displays the 10 most recent files that have been used in that given Mac app. While 10 recent documents is a fair amount, many of us prefer to have more recent files visible in those Recent Files menus, and that’s what we’ll show how to adjust with a simple settings change. Users will have options to set the recent document list to: none, 5, 10, 15, 20, 30, or a whopping 50 recently used files, though


  1. Go to the  Apple menu and open System Preferences

  2. Choose the “General” panel

  3. Look for the “Number of Recent Items” option near the bottom – this is often erroneously displayed in Mavericks (a bug, presumably) so just look for the number submenu next to “Documents, Apps, and Servers”

  4. Pull down the submenu and choose the number of recent files you wish to display in the “Open Recent” menu

  5. Close out of System Preferences, and then quit and relaunch the app(s) to see the change


Change Open Recent menu file number in Mac OS X


Using the TextEdit app as an example, making this change to show 20 recent items reveals many more options in the “Open Recent” menu.


Change the Open Recent menu file count in Mac OS X apps


It’s important to note that making the change to “Open Recent” menu also directly changes the “Recent Items” submenu visible in the  Apple menu… why an application-level control is directly correlated to a system-level item is a little peculiar, as it would likely make more sense for them to be separate – something that may be possible with a ‘defaults write’ command (any ideas? let us know!). On the positive side of these settings being directly related, it could be easier to see files that may have been opened without user consent by increasing the number of visible items overall.


Note for those wanting to return to the default opting this setting in all versions of OS X is set to ’10′ recent items.


This trick works the same with just about every version of Mac OS X, though some changes were made to OS X Mavericks which removes some specificity. Prior to Mavericks, users were able to adjust the number of recent items on a very specific basis, setting a unique number for Applications, Documents, and Servers. Now, there is only one option that covers all of them, which carries into the  Apple menu as well.


For those who don’t use the Recents items lists because they are tucked within a menu, you can also enable a hidden Recent Items list in the Dock of OS X by using a defaults command.


Thanks to @sambowne on Twitter for the tip idea, don’t forget to follow us there too.


Email this Change the Number of Files Shown in “Open Recent” Menu Items of OS X to a Friend! Receive Articles like this one direct to your email box! Subscribe for free today!

How to Merge Contacts on the iPhone from iOS osxdailynews.blogspot.com

osxdailynews.blogspot.com ® How to Merge Contacts on the iPhone from iOS

It’s practically inevitable for duplicate contact information to appear on an iPhone or iPad over the course of using an iOS device, whether by accident, typos, through sharing vcard information with others, or from something as basic as contacts changing their names and addresses, for which another entry may be added. For quite some time, there was no simple way of handling these duplicate (or triplicate) contact entries directly on the device, but that has finally changed with iOS 7, and now there is an easy way to merge those contacts directly on the iPhone.


How to Merge Contacts in iOS


Because this is done entirely on the iOS device, there is no longer any need to have to sync back to iCloud, iTunes, or a computer for the change to take effect, instead you make the change once directly on the iPhone, and thanks to iCloud, it will propagate automatically to other iOS and OS X devices that use the same Apple ID.


Merging Duplicate Contacts in iOS


The feature is actually called “Link Contacts”, which is perhaps why it’s not widely used and often overlooked, here is how to use it:


  1. From the Phone app or the Contacts app, open the contact you wish to merge other duplicate contacts with

  2. Tap on the “Edit” button

  3. Scroll down to find “Linked Contacts”, then tap on the green plus icon “(+) link contacts…” to link/merge the contact with another

  4. Locate the contact to merge (either a duplicate or a changed addressee) and tap on the name, then tap on “Link” in the corner

  5. Repeat for more than one duplicate, otherwise tap on “Done” to finish the merging


This instantly merges all contact details from the two (or more) contact cards into a single contact entry – it does not overwrite phone number, address, or email information, it simply merges all details into a single card.


In the example screenshots, the address information for multiple “Santa” and “Santa Claus” has been merged into a single card. The first contact edited will be the one that accepts the merged details:


Merge contacts on the iPhone with Link Contacts feature in iOS


Next, simply find and “Link” the additional contact cards, whether they are duplicates, triplicates, alternate address information, or whatever else:


Merging contacts on the iPhone using the iOS Link Contacts feature


Once you choose “Done”, there will only be a single contact for the details you merged (linked), in this example it’s “Santa Claus”.


The unique thing about the “Link Contacts” method is that although it merges the contacts from the user perspective, it can be easily be undone if you decide to unmerge/unlink the contact details. To do that, just go back to the contact in question, tap on “Edit” and then tap on the red (-) icon along the linked contacts details.


There are other ways to do this which may prove easier for some iPhone users, like those who have their device synced to a Mac and would prefer to manage the details from a computer, or for users who aren’t running the newest versions of iOS and thus don’t have the Link/Merge option at all. Two such alternate methods that can work in these circumstances are merging addresses from OS X and then syncing the address book back to the iPhone, or merging & removing duplicates with the Contacts app from Mac OS X and relying on the iCloud sync feature to carry the changed address information over to the iPhone.


Email this How to Merge Contacts on the iPhone from iOS to a Friend! Receive Articles like this one direct to your email box! Subscribe for free today!

Senin, 02 Desember 2013

How to Merge Contacts on the iPhone from iOS osxdailynews.blogspot.com

Written By Unknown; About: How to Merge Contacts on the iPhone from iOS osxdailynews.blogspot.com on Senin, 02 Desember 2013

osxdailynews.blogspot.com ® How to Merge Contacts on the iPhone from iOS

It’s practically inevitable for duplicate contact information to appear on an iPhone or iPad over the course of using an iOS device, whether by accident, typos, through sharing vcard information with others, or from something as basic as contacts changing their names and addresses, for which another entry may be added. For quite some time, there was no simple way of handling these duplicate (or triplicate) contact entries directly on the device, but that has finally changed with iOS 7, and now there is an easy way to merge those contacts directly on the iPhone.


How to Merge Contacts in iOS


Because this is done entirely on the iOS device, there is no longer any need to have to sync back to iCloud, iTunes, or a computer for the change to take effect, instead you make the change once directly on the iPhone, and thanks to iCloud, it will propagate automatically to other iOS and OS X devices that use the same Apple ID.


Merging Duplicate Contacts in iOS


The feature is actually called “Link Contacts”, which is perhaps why it’s not widely used and often overlooked, here is how to use it:


  1. From the Phone app or the Contacts app, open the contact you wish to merge other duplicate contacts with

  2. Tap on the “Edit” button

  3. Scroll down to find “Linked Contacts”, then tap on the green plus icon “(+) link contacts…” to link/merge the contact with another

  4. Locate the contact to merge (either a duplicate or a changed addressee) and tap on the name, then tap on “Link” in the corner

  5. Repeat for more than one duplicate, otherwise tap on “Done” to finish the merging


This instantly merges all contact details from the two (or more) contact cards into a single contact entry – it does not overwrite phone number, address, or email information, it simply merges all details into a single card.


In the example screenshots, the address information for multiple “Santa” and “Santa Claus” has been merged into a single card. The first contact edited will be the one that accepts the merged details:


Merge contacts on the iPhone with Link Contacts feature in iOS


Next, simply find and “Link” the additional contact cards, whether they are duplicates, triplicates, alternate address information, or whatever else:


Merging contacts on the iPhone using the iOS Link Contacts feature


Once you choose “Done”, there will only be a single contact for the details you merged (linked), in this example it’s “Santa Claus”.


The unique thing about the “Link Contacts” method is that although it merges the contacts from the user perspective, it can be easily be undone if you decide to unmerge/unlink the contact details. To do that, just go back to the contact in question, tap on “Edit” and then tap on the red (-) icon along the linked contacts details.


There are other ways to do this which may prove easier for some iPhone users, like those who have their device synced to a Mac and would prefer to manage the details from a computer, or for users who aren’t running the newest versions of iOS and thus don’t have the Link/Merge option at all. Two such alternate methods that can work in these circumstances are merging addresses from OS X and then syncing the address book back to the iPhone, or merging & removing duplicates with the Contacts app from Mac OS X and relying on the iCloud sync feature to carry the changed address information over to the iPhone.


Email this How to Merge Contacts on the iPhone from iOS to a Friend! Receive Articles like this one direct to your email box! Subscribe for free today!

How to Merge Contacts on the iPhone from iOS osxdailynews.blogspot.com

osxdailynews.blogspot.com ® How to Merge Contacts on the iPhone from iOS

It’s practically inevitable for duplicate contact information to appear on an iPhone or iPad over the course of using an iOS device, whether by accident, typos, through sharing vcard information with others, or from something as basic as contacts changing their names and addresses, for which another entry may be added. For quite some time, there was no simple way of handling these duplicate (or triplicate) contact entries directly on the device, but that has finally changed with iOS 7, and now there is an easy way to merge those contacts directly on the iPhone.


How to Merge Contacts in iOS


Because this is done entirely on the iOS device, there is no longer any need to have to sync back to iCloud, iTunes, or a computer for the change to take effect, instead you make the change once directly on the iPhone, and thanks to iCloud, it will propagate automatically to other iOS and OS X devices that use the same Apple ID.


Merging Duplicate Contacts in iOS


The feature is actually called “Link Contacts”, which is perhaps why it’s not widely used and often overlooked, here is how to use it:


  1. From the Phone app or the Contacts app, open the contact you wish to merge other duplicate contacts with

  2. Tap on the “Edit” button

  3. Scroll down to find “Linked Contacts”, then tap on the green plus icon “(+) link contacts…” to link/merge the contact with another

  4. Locate the contact to merge (either a duplicate or a changed addressee) and tap on the name, then tap on “Link” in the corner

  5. Repeat for more than one duplicate, otherwise tap on “Done” to finish the merging


This instantly merges all contact details from the two (or more) contact cards into a single contact entry – it does not overwrite phone number, address, or email information, it simply merges all details into a single card.


In the example screenshots, the address information for multiple “Santa” and “Santa Claus” has been merged into a single card. The first contact edited will be the one that accepts the merged details:


Merge contacts on the iPhone with Link Contacts feature in iOS


Next, simply find and “Link” the additional contact cards, whether they are duplicates, triplicates, alternate address information, or whatever else:


Merging contacts on the iPhone using the iOS Link Contacts feature


Once you choose “Done”, there will only be a single contact for the details you merged (linked), in this example it’s “Santa Claus”.


The unique thing about the “Link Contacts” method is that although it merges the contacts from the user perspective, it can be easily be undone if you decide to unmerge/unlink the contact details. To do that, just go back to the contact in question, tap on “Edit” and then tap on the red (-) icon along the linked contacts details.


There are other ways to do this which may prove easier for some iPhone users, like those who have their device synced to a Mac and would prefer to manage the details from a computer, or for users who aren’t running the newest versions of iOS and thus don’t have the Link/Merge option at all. Two such alternate methods that can work in these circumstances are merging addresses from OS X and then syncing the address book back to the iPhone, or merging & removing duplicates with the Contacts app from Mac OS X and relying on the iCloud sync feature to carry the changed address information over to the iPhone.


Email this How to Merge Contacts on the iPhone from iOS to a Friend! Receive Articles like this one direct to your email box! Subscribe for free today!

Change the Number of Files Shown in “Open Recent” Menu Items of OS X osxdailynews.blogspot.com

osxdailynews.blogspot.com ® Change the Number of Files Shown in “Open Recent” Menu Items of OS X

Adjusting the number of files in the Recent list


The File menu in just about every file-centric application throughout OS X has an “Open Recent” option, which displays the 10 most recent files that have been used in that given Mac app. While 10 recent documents is a fair amount, many of us prefer to have more recent files visible in those Recent Files menus, and that’s what we’ll show how to adjust with a simple settings change. Users will have options to set the recent document list to: none, 5, 10, 15, 20, 30, or a whopping 50 recently used files, though


  1. Go to the  Apple menu and open System Preferences

  2. Choose the “General” panel

  3. Look for the “Number of Recent Items” option near the bottom – this is often erroneously displayed in Mavericks (a bug, presumably) so just look for the number submenu next to “Documents, Apps, and Servers”

  4. Pull down the submenu and choose the number of recent files you wish to display in the “Open Recent” menu

  5. Close out of System Preferences, and then quit and relaunch the app(s) to see the change


Change Open Recent menu file number in Mac OS X


Using the TextEdit app as an example, making this change to show 20 recent items reveals many more options in the “Open Recent” menu.


Change the Open Recent menu file count in Mac OS X apps


It’s important to note that making the change to “Open Recent” menu also directly changes the “Recent Items” submenu visible in the  Apple menu… why an application-level control is directly correlated to a system-level item is a little peculiar, as it would likely make more sense for them to be separate – something that may be possible with a ‘defaults write’ command (any ideas? let us know!). On the positive side of these settings being directly related, it could be easier to see files that may have been opened without user consent by increasing the number of visible items overall.


Note for those wanting to return to the default opting this setting in all versions of OS X is set to ’10′ recent items.


This trick works the same with just about every version of Mac OS X, though some changes were made to OS X Mavericks which removes some specificity. Prior to Mavericks, users were able to adjust the number of recent items on a very specific basis, setting a unique number for Applications, Documents, and Servers. Now, there is only one option that covers all of them, which carries into the  Apple menu as well.


For those who don’t use the Recents items lists because they are tucked within a menu, you can also enable a hidden Recent Items list in the Dock of OS X by using a defaults command.


Thanks to @sambowne on Twitter for the tip idea, don’t forget to follow us there too.


Email this Change the Number of Files Shown in “Open Recent” Menu Items of OS X to a Friend! Receive Articles like this one direct to your email box! Subscribe for free today!